Getting Started With GIMP
Once you've downloaded and installed the GIMP, you are ready to start manipulating some images!
Open GIMP the same way you would open any other program. For example in Windows, you can either double click on an icon on the desktop or go Start > All Programs > GIMP > GIMP 2 (or whatever version is installed). On the Mac you can open GIMP from your Applications folder or the Launchpad.
You can also open GIMP from the command line if that's what you're using. To do this, type gimp-2.8 or whatever version is installed (or if you have multiple versions, whichever version you want to run).
GIMP will also open whenever you double-click on a file that's associated with GIMP. For example, if you've configured your computer to associate say, PNG files to open with GIMP, whenever you double-click a PNG file, it will open within GIMP. If GIMP isn't already open, it will automatically launch in order to open the image.
GIMP's Main Toolbox
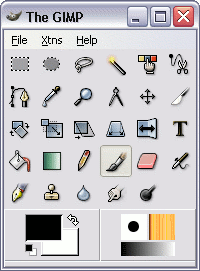
When you open the GIMP, the only thing that appears is a toolbox. The toolbox looks something like this:

This toolbox is the centerpiece of the GIMP. Most of the time, you'll be using options from this toolbox.
The main toolbox provides shortcuts to the most commonly used tools in GIMP. The top row includes selection tools — tools for selecting areas of an image. The toolbox also provides tools for rotating an image, scaling an image, adding text, adding color, and more.
Hovering the mouse over an icon will usually bring up a "tooltip" that explains what the tool is or what you can do with it. Also, in many cases you can press the F1 key to get help about the tool that you're hovering over.