Create an Animated GIF using Layers
This page demonstrates how to create an animated GIF in GIMP using layers.
If you're a regular GIMP user, chances are you probably already know 90% of what it takes to create an animated GIF. The other 10% is the easy part!
Before/After
First, let's look at the "before" and "after" images.
-
Before
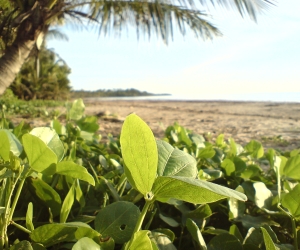
This is just a normal photograph.
We will take this image, add some text, then create an animated GIF.
-
After
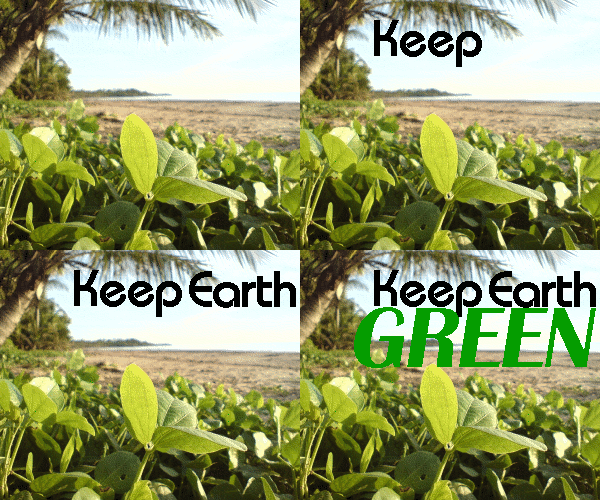
Here is the finished animated GIF.
All I've done is added some layers of text. The animation simply loops through those layers.
While most browsers support animated GIFs, some don't. If you can't see the animation in this example, your browser may not support animated GIFs.
How to Create an Animated GIF
I created the above animated GIF using layers.
To create an animated GIF using layers:
-
Open Image
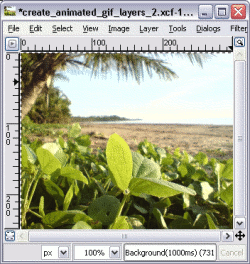
Open an image that you'd like to turn into an animated GIF.
-
Add the Text or other additions
Add some text (or anything else you like) to the image.
Each layer represents a different frame in the animation, so be sure to add a new layer for each frame.
In my example, I added 3 layers of text.
-
Animate the Layer
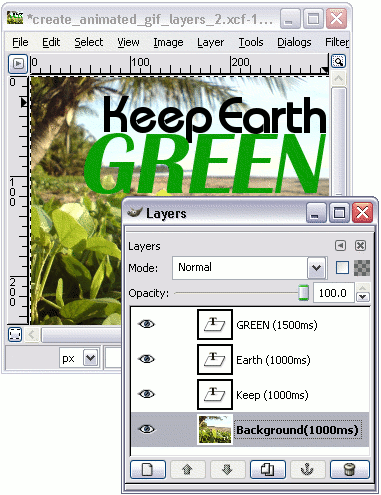
Now for the important part.
Write the amount of milliseconds each layer is to appear in the animation. Write this number in parentheses followed by ms.
For example: (1500ms). Just like in the screenshot.
-
Launch the Preview
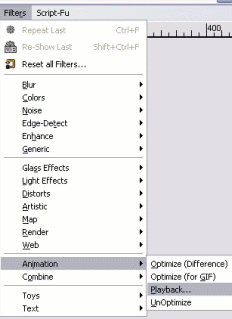
You can now preview your animated GIF.
To preview, select Filters > Animation > Playback.
-
Play the Animation
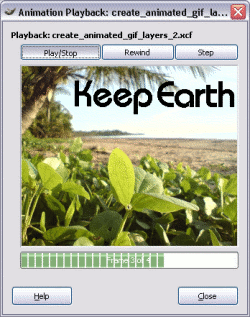
Now a copy of your image will have opened in another window — the Animation Playback window.
Click Play/Stop or step through the animation as required.
-
Export Image
Once you're happy with the animation, export the image (File > Export) and select GIF image (*.gif).
If you're not happy, go back and try again.
-
Export Options
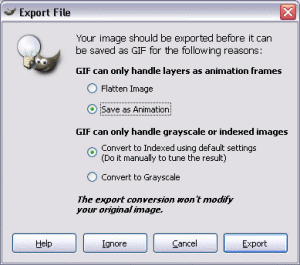
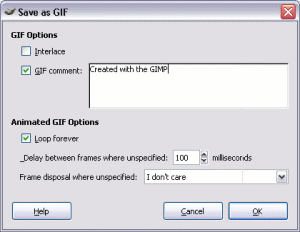
When prompted, select As Animation, then Export.
These screenshots use an older version of GIMP, and these dialogs came from the Save As option.
With later GIMP versions, you simply export instead of save. When doing this, both of these dialogs are combined into one.
There you have it! That's all it takes to create an animated GIF using layers with the GIMP!
A Word On Filesize
Animated GIFs can become very large if you're not careful. To keep the file size down, try not to use too many colors in your animated GIFs. Also, avoid dithering for the same reason.