SQL Server 2014 Installation
This page demonstrates how to install SQL Server 2014 on Windows Server 2012 R2 using the installation wizard.
In this installation, I installed SQL Server 2014 Express with Tools on Windows Server 2012 R2 that I downloaded from the MSDN website. These are the steps that I needed to perform for a successful installation. Your steps might be slightly different (depending on the version of SQL Server that you're installing and your configuration).
If you don't have a copy of SQL Server to install, you can download SQL Server from Microsoft's website.
Install .NET 3.5 Framework
One of the prerequisites for SQL Server 2014 is .NET 3.5 Framework. Windows 2012 uses .NET 4.0 by default and in order to use .NET 3.5, you need to install it first (unless you've already done so).
It's usually better to ensure you have .NET 3.5 installed before you start the SQL Server installation, however, you can still do it during the installation (which is what I did for the following installation). Once I got to a point where the SQL Server installation wouldn't proceed until I'd installed .NET 3.5, I simply went ahead and installed it, then carried on with the SQL Server installation.
If you need to install .NET 3.5, here are the instructions for installing the .NET 3.5 Framework. As mentioned, you can perform this step prior to the SQL Server installation, or during.
Install SQL Server
The following installation was performed using the Installation Wizard.
- Double click on the installation file (mine was an ISO file called SQLEXPRWT_x64_ENU at 853,214 KB)
- Click Yes if asked Do you want to allow the following program to make changes to this computer?
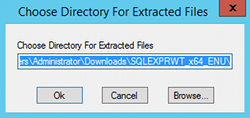
- When prompted to Choose Directory for Extracted Files, click OK to use the default directory, or click Browse... and select a different directory:
- The installation will begin:

- You will be asked if you want to perform a new stand-alone installation or upgrade from a previous version of SQL Server. To perform a new stand-alone installation, click New SQL Server stand-alone installation or add features to an existing installation:

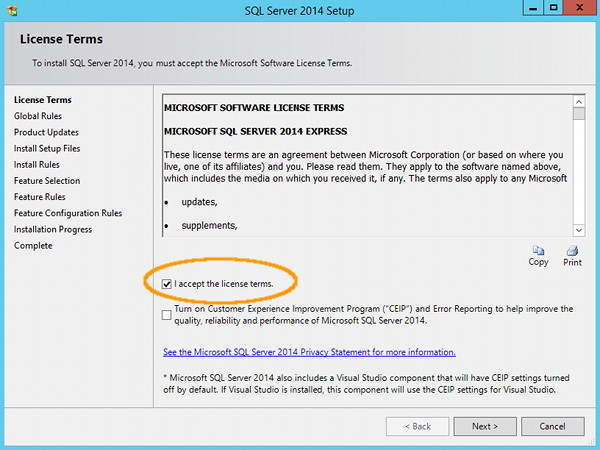
- If you agree with the licence terms, select I accept the licence terms and click Next:
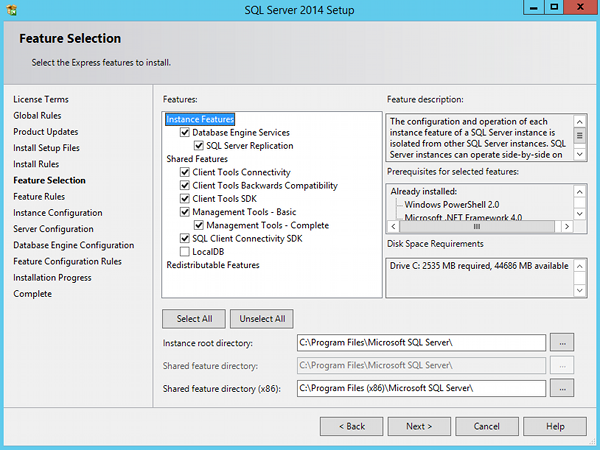
- At the Feature Selection screen, select or deselect the features you'd like to include or exclude. You can see a decription of each feature by clicking on it. The description appears in the top-right pane. Under this pane you can see the prerequisites and requirements based on the selected features. You can also change the default directories listed at the bottom if you wish. The following screenshot shows the default features (and this is what I used to install SQL Server). Once happy with the selected features, click Next:
- At this point, if you haven't already installed the .NET Framework 3.5, you will receive the following error:
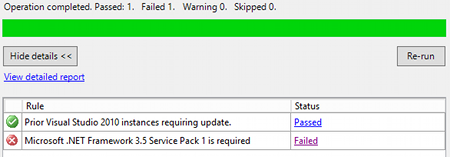
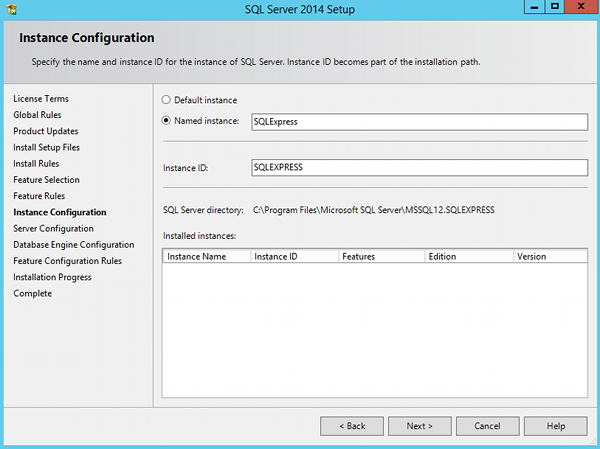
Clicking on the Detailed Report will open a detailed System Configuration Check Report. To install the .NET 3.5 Framework, see install .NET 3.5 Framework. Once you've installed the .NET 3.5 Framework, click on Re-run. - Specify the instance path (or leave it at the default) and click Next:
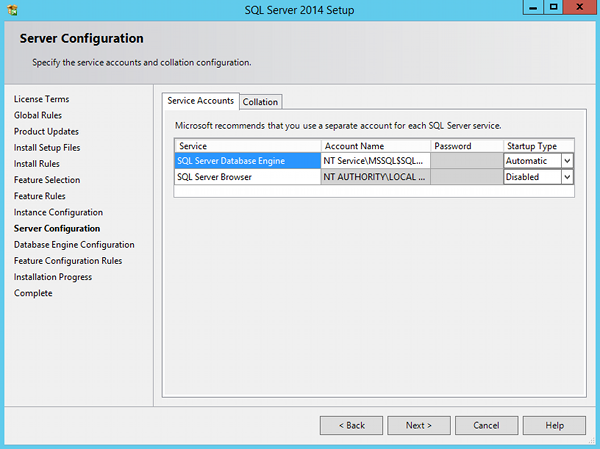
- On the Server configuration screen, you can specify user accounts and startup type, or simply leave it at the default configuration. Once you're happy with the configuration, click Next:
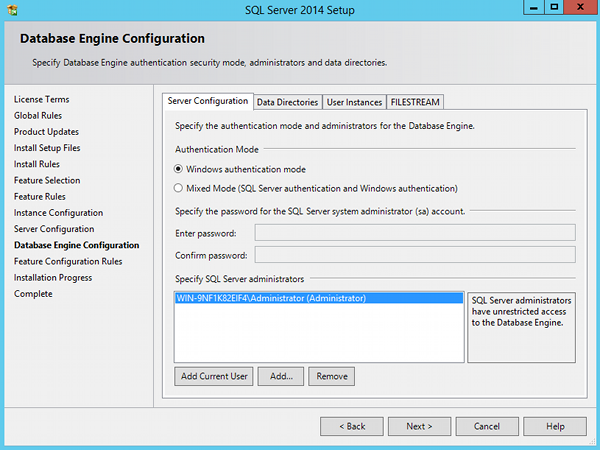
- On the Database engine configuration screen, you can either leave the default settings or change to suit your requirements. You can specify the authentication mode that SQL Server will use, as well as the SQL Server administrator. At least one system administrator must be provided. You can also change the Data Directories or leave at the default. Once you're happy with the database engine configuration, click Next:
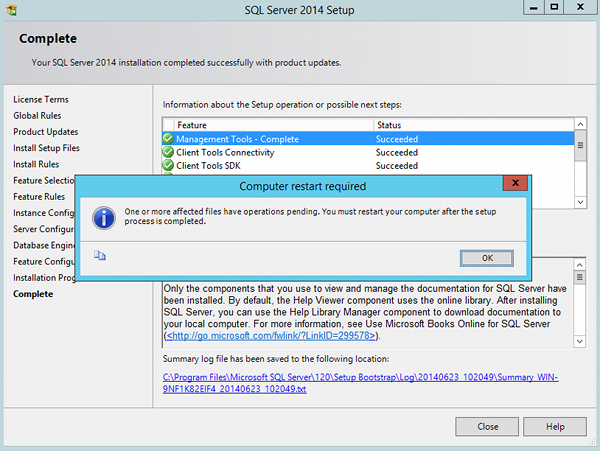
- The installation will commence. Once complete, you may be asked to restart your computer. Click OK and restart the computer:
SQL Server 2014 should now be installed.
Other Installation Methods
SQL Server 2014 can be installed using a number of methods. Here are the instructions for each method from the Microsoft website:
- from the command prompt
- using a configuration file
- using SysPrep
- creating a new SQL Server failover cluster
- upgrading from a previous version using the installation wizard
- using the installation wizard to perform a new installation (this is the method used in the above installation)
Once you've installed SQL Server 2014, you can fire it up and open the SQL Server Management Studio.