Microsoft Access 2003 - Modify a Form
See Microsoft Access Tutorial for a tutorial on a more recent version of Access.
In the previous lesson, we used the "Form Wizard" to create a form. In this lesson, we're going to modify the form.
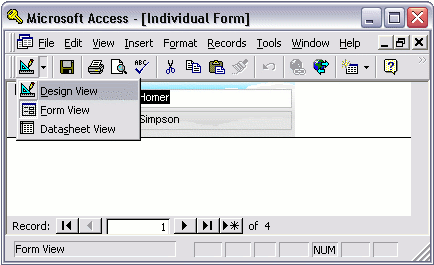
At the end of that lesson, we were able to see our form in "Form View". Form View is the way the form is intended to be viewed by the user. If we want to modify it, we need to switch to "Design View".
Selecting "Design View"
To switch to Design View, select "Design View" from the "File" menu:
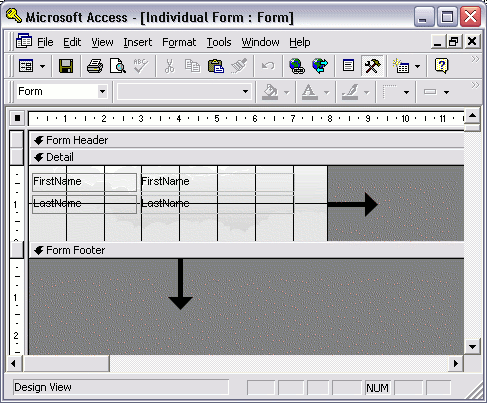
Enlarging the Form
To make the form taller, click on the "Form Footer" panel and drag it down. To make the form wider, click on the edge of the form and drag it across:
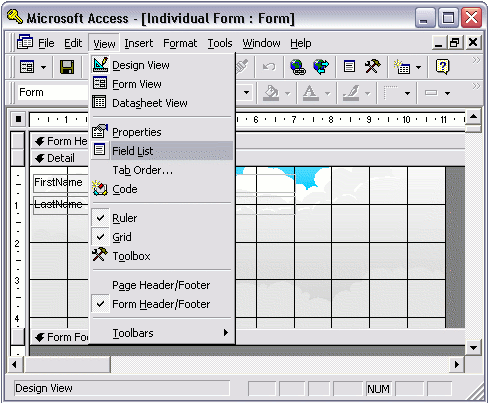
Adding a Field
Let's say we want to add the IndividualId field to the form. To do this:
- Select "Field List" from the "View" menu:
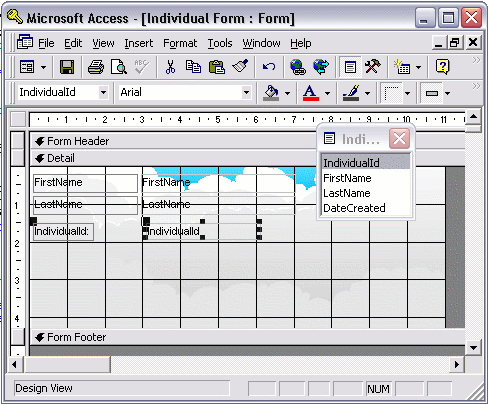
- You should now see a "Field List" panel. From this panel, click and drag the field you want onto the form area. When you release your mouse, the field will be added to the form:
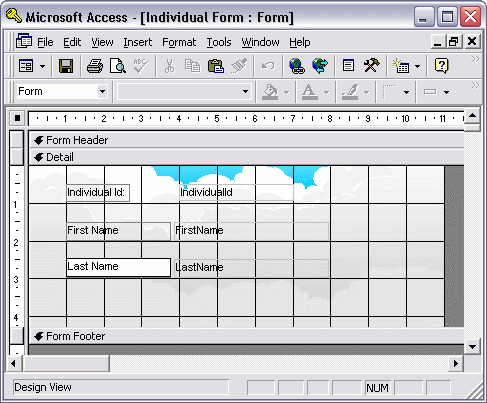
Re-arranging the Fields
You might have noticed that the label for our fields appear exactly as the name of the field. This is OK, but we have no space between multiple words (i.e. "FirstName" appears instead of "First Name"). You can fix this by simply clicking in the label area and re-wording the label.
Also, while we're changing the form around, let's move the IndividualId field to the top of the form. To move the fields around, click on the edge of the field and hold your mouse down. When you see the cursor turn into a hand, reposition the field to the new location, then release the mouse.
You can re-size a field by clicking the edge and dragging once your cursor turns in to a two-headed arrow.
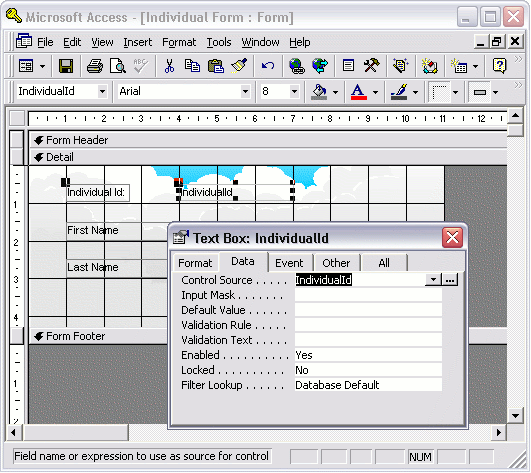
Properties
For any element that you select, you can view/change its properties. To view the properties panel, select "Properties" from the "View" menu.
The following screenshot shows that we are viewing the properties for the IndividualId text box. The "Data" tab is selected, which shows us the source of the data to populate the text box. The "Formatting" tab enables us to change the way the field is displayed.
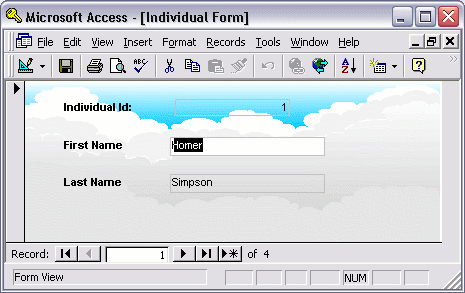
Viewing the Result
Of course, you can always switch back to Form View at any time to see what your form looks like. You can see by this example that I changed the property of the labels so that their font weight is bold:
Update
Since this tutorial was written, there have been many subsequent updates to Access. Here's the latest Access tutorial.
-
Access 2016 Tutorial
This tutorial covers a lot more than was in the 2003 tutorial.
Microsoft Access 2016 is the successor to Access 2013.
Go to Access 2016 Tutorial -
Database Tutorial
If you don't currently have an understanding of how databases work, no worries — I have written a basic database tutorial just for you!
This tutorial covers the basic concepts of databases, and the examples use Microsoft Access, so that will make it easier for you once you return to the Access tutorial.
Go to the Database Tutorial